Thursday, April 25, 2019

Good Morning Spring - PolkaDot Orchard DT project

Hello, hello

good news are on the way. Starting with today.s project, I am a DT member for PolkaDot Orchard :) So happy and grateful. I love Jessica.s digi stamps and it is a real pleasure to work with them. 

If you go and check the Etsy shop you will become addicted :) They are so versatile and beautiful and you will have a blast working with them.

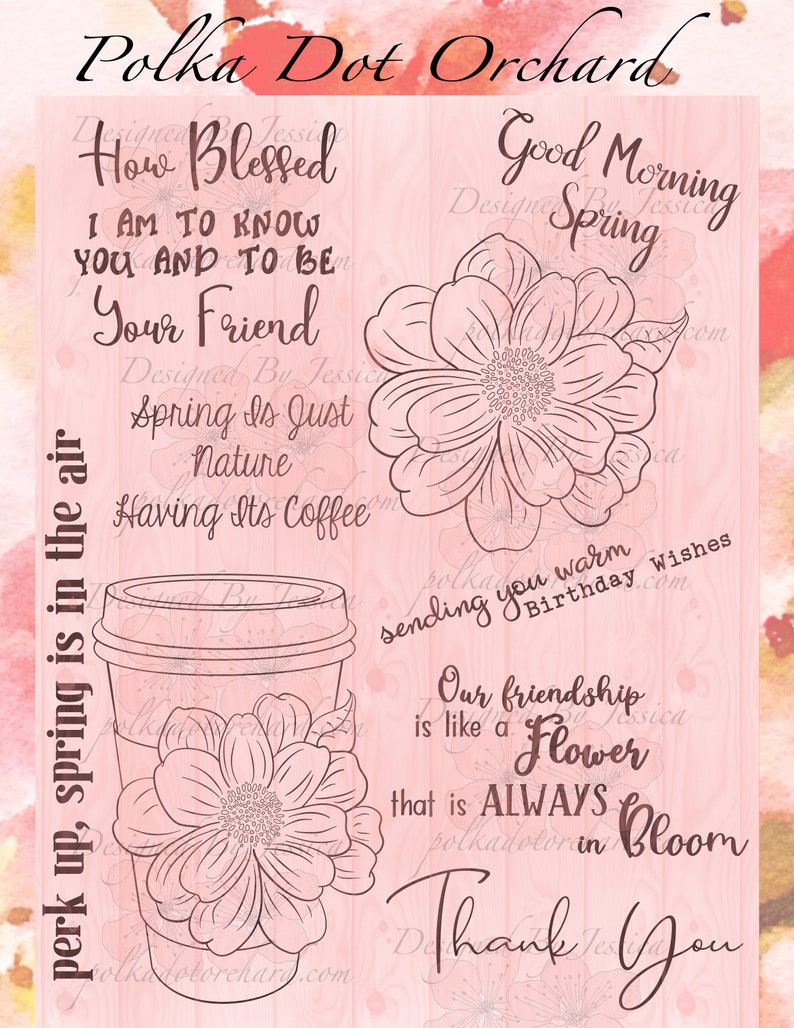
For my project for today I used the Good Morning Spring digi set. 

Steps in creating my card:
1. Cut the card base 10.5 x 14.5 cm from 300g/sqm white card stock.

2. Cut the main panel from white card-stock which I embossed and distressed using Distress Oxide - Bundled Sage.

3. I added some coloured splashes using mixed media inks.

4. Printed and coloured the flower stamp. For colouring I used Polychromos pencils. And then did some fussy cut.

5. Added glossy accents, white dots using a white gel pen and some glitter using Spectrum Noir Sparkle.

6. Die cut some leaves using 3 different greens.

7. Glued everything together and added the fussy cut sentiment.


And this is it!
really hope you will enjoy it. Until next time, stay safe and take care!
Huggies all!


image 0
- this is the digi set I used :)


Tuesday, April 23, 2019

Baby Girl - Goha Digital Stamps

Hello, my lovelies

It is time for Goha monthly project.
For you today I have an easel card with a lovely stamp from Goha Digital Stamp - Baby Girl with Teddy Bear. If you check out the facebook page you will definitely find plenty more beautiful stamps for all occasions.

So, because a new baby card is always a good asset in your stash, i decided to make one the moment I saw the cute stamp.

The easel template is very easy to do and lately i seem to find them pretty handy for my projects.

The main panel is made with a stencil and some distress oxide. I also added a square frame from one of my Tonic Kits on which I have the printed and colored digi stamp. I used my polychromos pencils to color the cute little girl and her teddy bear. I added some glitter and glossy accents and on top of it I have a banner die cut from glitter card-stock.

The bottom stopper is a chipboard baby stroller glued on a tag piece of pink and white card stock. 

I also added a sentiment which is die cut from the same glitter card stock as the banner.

And there it is!

Hope you will like it! 
Feel free to comment and follow me to see all my future projects.
Until next time, take care and stay safe!

Huggies all!


Wednesday, April 17, 2019

Daisy Hello card - Scrapyland #112 challenge


It is Wednesday so this means, challenge time at ScrapyLand.


For inspiration today I have a card I made using dies from Elizabeth Craft Designs - Daisy For the moment this specific die set is not available but you can use any other flower die to recreate the card.
It is very simple to make.


1. Cut the base 10.5 x 28 cm from a 300g/sqm white card stock. Score it in half
2. Cut a base panel using any type of pattern paper - 10x13.5 cm
3. Cut a tag shape using a die or just your scissors.
4. Cut and assemble the flowers and glue them down on the tag.
5. Add leaves and all other extras that you consider fitting.
6. Add a die cut or stamped sentiment and there it is.

Your card is ready.
It is very simple and you can use I for multiple purposes, according to what you need.

This is mine, hope you will enjoy it!


For the Scrapy Land challenhes the theme is always ANYTHING GOES. 
All you have to do is to use for your project at least one brand of die that you can shop over at Scrapy Land.  
For each challenge there are TWO WINNERS.  
One will be a random winner and the other is chosen by the Design Team.  Each winner will receive a generous $10 gift certificate to Scrapy Land.


Please link back to this Scrapy Land Challenge and include the link to this challenge on your blog post.  It would also be extremely helpful if you would list the brands of dies used in your project.
  

We cannot wait to see what you create! 

Until next time, stay safe and take care :)


Monday, April 15, 2019

Mother's Day passport Kit - Taylormadecards4u

Hello my lovely friends,
it seems that the month of April is a very busy and creative one.
 For you today I have a joy fold type card. A very easy one but with a little creativity it can very easily transform into an elegant and beautiful project.
And what better supplies to match, but the beautiful My Mother's Garden Passport Kit from Taylormadecards4u?


So, how I did my card?
I will leave the link for the template here - https://www.youtube.com/watch?v=wwx-zSWVcJw

And I decorated mine using the amazing ephemera and papers from the kit provided by Monica from Taylormadecards4u.https://www.taylormadecards4u.com/product-page/my-mother-s-garden-passport-kit?fbclid=IwAR1zk3O1gejP46eqY033iJSjqiB3s5MnGLPdDCNkhEsa8W4uTxooFyStUiA


The rose on the top panel is a layered one. I made it using the rose from the Layered Rose Set.


The rose on top has layers and I used 2 leaves to make the closing device.


Inside I have some tags which I altered and distressed. You can use them for pictures or messages.
There are also 4 beautiful ephemera on which you can also add something or you can leave them as they are. There is a beautiful poem for Mom and the images are just adorable.


The inside opens in the shape of a card and the beautiful pattern paper from the kit is just perfect for the whole layout.


          There is plenty of space to add messages or pictures.


The back is also decorated with a strip of pattern paper from the kit and a beautiful rose, giving thus the impressions of a beautiful rose bouquet.

make sure you check out the new site and also register as there are nice things happening all the time.

Until next time, stay safe and take care!
Huggies all!

The new shop is waiting for you with brand new supplies :)
Make sure you check them out. 

Sunday, April 14, 2019

Easter treat box - sending Easter hedgehugs

Hello, hello


We are getting ready for Easter. And it is time for another project using digi stamps from Heartcraft Paper
And so I decided to make a treat box for the chocolate eggs. 
The best choice for the tag I considered to be the Cute Hedgehog 

The box is made using a die from a Tonic Kit and for the tag I die cut an egg shape which I decorated using washi tape and on which I glued the hedgehog which I printed, coloured using Polychromos pencils.
I tied it together with orange and white twine thread.
And there it is :)
The perfect box for little chocolate eggs.

Hope you will enjoy my project and until next time, stay safe and take care!


Sunday, April 7, 2019

Magic rain Card - Angie's Digital Designs :)

Howdy everyone,

It is time for challenge #30 over at Angie's Digital Stamps. This month there is an optional Easter twist for your projects.
My inspiration project for you this month is a magic rain card. You can see the tutorial here, on Laura Dovalo's channel. It is a bit time consuming but the result is absolutely worth it. As main element, I used the very cute Birds playing in Birdbath digital stamp from Angie's.


I made by base panel using watercolor paper on which I played with blue and purple shades. The upper and lower clouds are made from glossy card stock on which I added distress ink. 
The digi stamp is colored using Polychromos and Supracolor soft pencils.I made the mechanism using small yellow beads and fishing string. Added the die cut sentiment and some flowers made with a small puncher. The clouds are also die cut from some pattern paper leftovers. Here and there some glossy accents and 3 little butterflies and ta da! This is it! make sure you check out and take part in our challenge. Prizes are on the way. :)

Until next time, stay safe and take care, huggies all!


Friday, April 5, 2019

Spring is here - Brown Sugar Challenge


Hello all!

Brown Sugar Challenge for April is ready to start. This month the theme is ”Spring or Fall”. Feel free to use your imagination and come up with something great, as usual :)
My inspiration for you is a card I made for Mother.s day which we, here in Romania, celebrate on 8th March.

It is a simple card but fits very well with the occasion.

I have the card base from 300g/sqm white cardstock on which I added an embossed panel. Over the panel I applied a die cut frame from some pattern paper I had in my stash. 
In the middle I glued a pink heart on which I added the flower stamp colored with markers. Because I only had 2 flowers on the stamp, I added an extra one, made of paper, for some more effect. Added the sentiment and a red white twine ribbon glued with a half white pearl. 

Hope you like the result.

here are the details for the challenge, make sure you have our projects uploaded. Wish everyone lots of luck and until next time, stay safe and take care. Huggies all!

Challenge No.: 289
Start Date: Friday, 5 Apr 2019
Theme: Your choice - Spring or Fall
Sponsor: None
Challenge Closes: Tuesday, 30 Apr


Thursday, April 4, 2019

Happy Easter - Heartcraft Paper project

Hop, hop, hop

Easter is coming ... ok in a few weeks, but still :)

For today I have a cute card made with wonderful digi stamps from Heartcraft paper. I have the Easter House and the 24 carrot Friend.

Because I was in the mood of doing something interactive, I decided upon a sliding card.

Steps.
1. Cut the base - 15 x 15 cm - 300g/sqm cardstock.

2. Cut a panel from polka dots pattern paper - 14 x 14 cm

3. Cut a white square panel - 10 x10 cm

4. Print, fussy cut and color the digital stamps with Promarkers - alcohol markers.

5. On a piece of Bristol smooth paper, I played with some Distress Oxides. Ok, it was supposed to be something else, but during the process i changed the plan. I cut an egg shape after I finished blending the inks.

6. I made the sliding mechanism.

7. Glued the house and decorated it with transparent half pearls and glossy accents. And I also added some decorative stones :)

8 I added a fluffy ball as the rabbit.s tail.

9. Added the sentiment and now the rabbit is ready to hop - up and down.

And this is it, really hope you will enjoy this :)

Until next time, stay safe and take care!


Wednesday, April 3, 2019

Hello card - Scrapy Land DT

Is is April, already? Ohh my, time does fly away! 

Today I have great news to share with you. Starting this month I am a member of the Scrapy Land family :) Yeyy, sooo happy and honored. I will be sharing with you projects made using the wonderful supplies that you can find at the ScrapyLand shop.

And if you decide to take part in our bi-weekly challenge, you will be able to win a 10$ gift certificate to use for your purchase over at ScrapyLand. Pretty cool, right?
The theme is Anything goes :)
You will be able to find quite a few amazing supplies.

So, my first project is a 13.5 x 13.5 cm card. I used 300g/sqm white cardstock. I cut a craft card stock panel and added on my base. Then I cut a 10 x 8 black cardstock and added on the craft one.
The main panel is made out of white cardstock with a  very discrete pattern on it. i blended some Distress Inks and played with a stencil I have in my stash. Over the leaves I added the cute tree from Elizabeth Craft Designs. I think they go perfect together. I also added two little bird houses, from the same set and the little mushrooms. 

The sentiment is made with letters from a Tonic Kit, but you can definitely do it with dies from a set like this - Elizabeth Craft Designs - Blackboard Alphabet. I added glossy accents on the letters for some extra effect. As a final element I glued down a chipboard bike on which I added 2 shiny rhinestones. 
And this is the final result. Hope you will enjoy it! 


products used:


Challenges I enter :
2. 

Monday, April 1, 2019

Hello Alice April


Hello everyone :)

It is time for another party over at Heartcraft Paper. We also have an April Link Party, so make sure you check it out.

For today, I have a pocket style card using the beautiful Alice digi stamp. It was really fun to make it, and easy too :)

The base is a 10.5 x 14 cm white cardstock - 300g/sqm.
I added a purple panel, slightly smaller which I punched on the upper side with a lacey cutting die.
I also made the pocket using a rectangular piece which i trimmed diagonally and decorated it with pattern paper. 

The main element is a post card on which I added the digital stamp which is colored using Promarkers. 
Added the foamy sentiment and the little pink heart and there it is. 


Make sure you check out my talented collegues' projects :)

Until next time, stay safe and take care! Huggies


April Magnolia :) - A Perfect Time to Craft


Hello all!

April is here, Spring is here, hopefully warm days are coming :)
So, it is also the beginning of a new challenge over at A Perfect Time to Craft
April's sponsor is  Sparkle’n’Sprinkle! 


I decided to play with the Lovely Magnolias Digital Kit
It is a great kit where you have both already colored pieces but you also have the black and white elements and you can make amazing projects with them.
So, because here in Romania, we celebrated Mother's Day on the 8th of March, I decide to make 2 projects. One for my Mom and one for my Mother in-law - whose birthday is also in March. So win-win for me.
First project is a mixed media type canvas. First I gessoed the canvas and after it dried I played with some gelatos and a wet wipe. I let it dry and meanwhile I fussy cut the elements.
As a background I used pattern paper from the kit, absolutely gorgeous and sooo versatile. I wrapped pieces of paper and glued them using mod podge. 
I made a floral decoration using a stencil and white structure paste. I glued the flowers in a 3D style, overlapping pieces. I used bigger flowers and smaller ones and glued them using mod podge and a heat glue gun. 
Because in a garden there are no flowers without birds, I die cut some birds and added them on the leaves. I was quite happy but there was still something else missing. And I found them - the small ladybugs. Aren't they just adorable?
As a final touch, some acrylic paint splashes and some glossy accents here and there. And ta da!!! there it is.


For my second project, I decided to make a card for my MOM! I used the same overlapping techniques and the gorgeous magnolias. It is a 15x15 cm card.
The base is made of 300g/sqm cardstock on which I added washi tape stripes. The background panel is made with a die from the Tonic Kit #17. 
There is also a ladybug and a red-white twine bow. Some glossy accents drops and the card is ready.


It was a real pleasure to work with this beautiful kit from Sparkle'n'Sprinkle.
Make sure you enter our challenge over at A Perfect Time to Craft.

Until next time, take care, stay safe and huggies all!

April Passport Card Kit - Taylormadecards4u


It is time for another Vintage project at Taylormadecards4u :) And with the beginning of spring, there is a brand new blog/shop. You will definitely love it. You can find all the beautiful supplies that Monica has in her Etsy shop. You will find blog posts and a lot of interesting things, so make sure you check it out.
My project for today is made with the  April Passport to Spring Kit. I decided to make a scrapbook page for my parents and the colors from the kit elements fit perfectly with the colors from the pictures. :) 


I took a 12 x12 inch paper from my stash. I stamped some butterflies using Rich Cocoa Memento ink. Then I blended the sentiment, using a stencil. I decorated the page using ephemera form the kit. I made a small pocket in which I added 2 ephemera. They are perfect for messages or some other photos. 

Added some washi tape, a sticker sentiment and some blue star rhinestones on the butterflies. The dimensional butterfly is from the kit and the flower in top of the page too.

Really hope you will enjoy it. Make sure to stay tuned because we are having another project this month, also :) I can assure you will not be sorry. 

Stay safe and take care, until next time!


Passport to Spring -  Digital Kit