Thursday, October 24, 2019

#12 Lavinia World Challenge


I absolutely love designing cards with the gorgeous stamps from Lavinia.
And because it is time for a new   Lavinia World Challenge, I have some inspiration for you.

My card today is something that I am quite proud of. I am really starting to get the hang of distress ink blending backgrounds


Card recipe
1. Cut the card base from a 300/gsm white card stock. 10.5 x 14.5 cm folded.

2. Cut a smaller panel from 80lbs white smooth Neenah paper

3. Golden heat embossed the Eden stamp and black ink stamping the Star Burst Set (LAV545) and  Snow Shrub (LAV501)

4. I used Distress Oxides inks and made the blended background.

5. Using a stencil with rain drops I added a little dimension with Nuvo Mousse 

6. I decided to leave the card without any sentiment because I think it can be used for many occasions


And this is it! Really hope you like it!


Now it is your turn!!!

Enter your project and win a $15 gift certificate to use it on a shopping spree Lavinia Worldand a challenge badge :) 

How can you do this? Sooo easy:
- In your project - use any type of rubber or clear stamps
- Digi stamps are not allowed
- THE THEME IS ALWAYS "ANYTHING GOES"
-It is a bi-weekly challenge starting on every other Thursday

If you need inspiration and not only make sure you follow us on:


Disclaimer:
Please note that although we carry the full Lavinia range, we are not part of any other entity or Facebook group that carries Lavinia stamps. ONLY the cards posted to Lavinia World Challenges will be entered into the drawing for the Lavinia World prize. 
Also note that the gift certificates are ONLY valid at the Lavinia World website. https://laviniaworldchallenges.blogspot.com/


We can't wait to see your creations!!


Wednesday, October 16, 2019

#124 Scrapy Land Challenge


The middle of October brings a new challenge over at 

And because it is time to start getting ready for Christmas, I decided to make a simple but cute card for Christmas.


Card Recipe:

1. Card base - 300gsm white card stock - plied dimension 10.5 x 14.5 cm 

2. Front base panel - 10 x14 cm on which I Added 4 strips of washi tape, as I have a loootttt in my stash :)

3. Cut the ornaments using white card stock and glossy green and red card stock - for my project I used the Elizabeth Craft Designs - Ornaments 2 - Dies 

4. The sentiment is from a set of silver stickers

So easy and so much fun to make one :)


Now it is your turn to play along

The theme is always ANYTHING GOES using any brand of die that Scrapy Land sells.

 There will be ONE winner and they will receive a
$15 Gift Certificate
to go shopping at Scrapy Land!!

The winner will be chosen by random.org and the Designers will still chose the Top Three and the Honorable Mentions. 

Scrapy Land carries over 55 brands of dies, so chances are you have a few of the brands in your stash!  You can see all the brands carried under the Products category.

Please link back to this Scrapy Land Challenge and include the link to this challenge on your blog post.  It would also be extremely helpful if you would list the brands of dies used in your project.  (Sometimes we can't tell if an item is a die cut or chipboard.)


We can't wait to see what you create!  It can be any style you like from CAS to mixed media and everything in between. Just be sure there's a die cut from a brand that Scrapy Land sells.


take care and happy crafting until next time :)
Challenges I enter my project to:


Tuesday, October 15, 2019

Fall Canvas - Taylormadecards4u Passport to Fall


Hello, hello
it is 15th of October and this means that it is time for a new project for Taylormadecards4u.
This time my project is made using Passport to Fall Digital Kit. It is such an adorable and versatile kit. You can make plenty of projects, from cards to albums.

My project is a Fall Canvas on which I decided to mix different elements. Dimensions of the canvas: 30 x 25 cm. First I gessoed everything and left it to dry. 


I played then with a stencil and some white structure paste and left it to dry. I added some more texture using Nuvo Mousse paste. 


 I continued with ink sprays and stamps. I also gold embossed the 2 pieces of chipboard and glued them down. 
Then, I made the 3 photo frames from paper and using a cutting die from Tonic Studios.  I decorated the frames with gorgeous pattern paper from the kit and elements cut from the ephemera found in the kit. I tried to mix them so that they match the 3 ephemera I glued on each frame.
There is a perfect combination between all the elements in the kit :)


As final touches I also added some leaves that I cut with a puncher.

Make sure you check out Monica's blog and shop :) You will definitely find great things for your projects. Until next time, take care, stay safe hugs and xoxo


Fall - Passport to Fall


Thursday, October 10, 2019

#11 Lavinia World Challenge


I absolutely love designing cards with the gorgeous stamps from Lavinia.
And because it is time for a new   Lavinia World Challenge, I have some inspiration for you.

My card today is something that I am quite proud of. The base is a distress oxide blending background, which I am not very good at, but with a lot of paper and patience I think i will get where I want :) 


Card recipe
1. Cut the card base from a 300/gsm white card stock. 10.5 x 14.5 cm folded.

2. Cut a smaller panel from 80lbs white smooth Neenah paper

3. Black heat embossed the Eden stamp and white heat embossed the Cherry Blossom

4. I used Distress Oxides inks and made the blended background.

5. Using a stencil with stars I added a little sparkled dimension with Nuvo Glitter paste.

6. Using a puncher I made the lateral pattern.

7. I decided to add two types of gems on the branch, just for some more effect. i used small pink pearls and yellow diamond gems, from my stash. :)


And this is it! Really hope you like it!


Now it is your turn!!!

Enter your project and win a $15 gift certificate to use it on a shopping spree Lavinia Worldand a challenge badge :) 

How can you do this? Sooo easy:
- In your project - use any type of rubber or clear stamps
- Digi stamps are not allowed
- THE THEME IS ALWAYS "ANYTHING GOES"
-It is a bi-weekly challenge starting on every other Thursday

If you need inspiration and not only make sure you follow us on:


Disclaimer:
Please note that although we carry the full Lavinia range, we are not part of any other entity or Facebook group that carries Lavinia stamps. ONLY the cards posted to Lavinia World Challenges will be entered into the drawing for the Lavinia World prize. 
Also note that the gift certificates are ONLY valid at the Lavinia World website. https://laviniaworldchallenges.blogspot.com/

We can't wait to see your creations!!


Wednesday, October 2, 2019

#123 Scrapy Land Challenge


The beginning of October brings a new challenge over at 

Fall is quickly getting settled so my inspiration for you today is a simple and easy Fall card.
For my project I am using stamps and dies from Tonic Studios Kit #12, but if you do not have it you can use any other leave cutting die and stamps.


Card Recipe:

1. Card base - 300gsm white card stock - plied dimension 10.5 x 14.5 cm and I cut an oval shape on the front panel

2. Front base panel - 10 x14 cm on which I played with Distress Oxides and then stamped the small leaves and acorn from the kit.

3. Cut the big leaf from brown thick card stock and white heat embossed the sentiment - also from the kit

4. Stamped and cut the little squirrel and acorn

5. Assembled all the elements

6. I added some glossy accents and some Nuvo Shimmer on the leaves on the fron panel and this is it. 

So easy and so much fun to make one :)

                 
Now it is your turn to play along

The theme is always ANYTHING GOES using any brand of die that Scrapy Land sells.

 There will be ONE winner and they will receive a
$15 Gift Certificate
to go shopping at Scrapy Land!!

The winner will be chosen by random.org and the Designers will still chose the Top Three and the Honorable Mentions. 

Scrapy Land carries over 55 brands of dies, so chances are you have a few of the brands in your stash!  You can see all the brands carried under the Products category.

Please link back to this Scrapy Land Challenge and include the link to this challenge on your blog post.  It would also be extremely helpful if you would list the brands of dies used in your project.  (Sometimes we can't tell if an item is a die cut or chipboard.)


We can't wait to see what you create!  It can be any style you like from CAS to mixed media and everything in between. Just be sure there's a die cut from a brand that Scrapy Land sells.


take care and happy crafting until next time :)
Challenges I enter my project to:

Wk 40 Anything Goes Crafting Challenge at Digi Choosday/Polkadoodles

Die Cut Divas


Tuesday, October 1, 2019

Fall Tags - Taylormadecards4u project


Fall is definitely here :) cold days with some sunshine, picking apples and the beautiful colour palette of the leaves :) Just perfect
And if it the 1st of October, I have a new project for you made with beautiful Fall Guest Checks from Taylormadecards4u.com.

I absolutely love a special tag accompanying a gift for someone dear, so every time I get the occasion I try and make some. Today I have 3 examples. They are mixed media tags and I used supplies of all sorts.


First I cut 3 tags from white thick cardboard.  I distressed them using distress oxides, in order to get a colored background. After they dried, I stamped the whole tag with a small text stamp from Prima Marketing. I printed and wrapped the guest checks and glued them on the tags.


I also distressed them using some vintage photo distress ink. Beneath the guest check, I glued some green leaves, different for each tag, just to add a little bit of a vibrant color. 


I also stamped some shapes, using a Tim Holtz stamp set - an acorn and two different leaves :)
Using Nuvo Mousse i distressed the edges of the checks.


In my stash, for years :)), I have been having some leaves made of some sort of fabric. Finding them, I decided that they fir perfectly with my tags so added them over a piece of creamy thread. On the leaves I glued some flowers and on each tag I added 3 different embellishments I made from ait dry clay :) Added a little of Nuvo mousse on top of them, too :)


For the final touches, I added some dots of 3D pearly liquid. :) 
Aren't they beautiful? I really like them and I will use them for some future gifts I have to send.


Make sure you check out Monica's shop where you will find plenty of gorgeous goodies to use for your project.
And also stay tuned for another fall project on the 15th :)


Until next time, take care, stay safe and be creative!
Huggies all :*

A perfect Time to Craft new Challenge


Hello, 

New month means that there is definitely time for a new Challenge over at A Perfect Time to Craft.


This month our sponsor is 
Image may contain: text

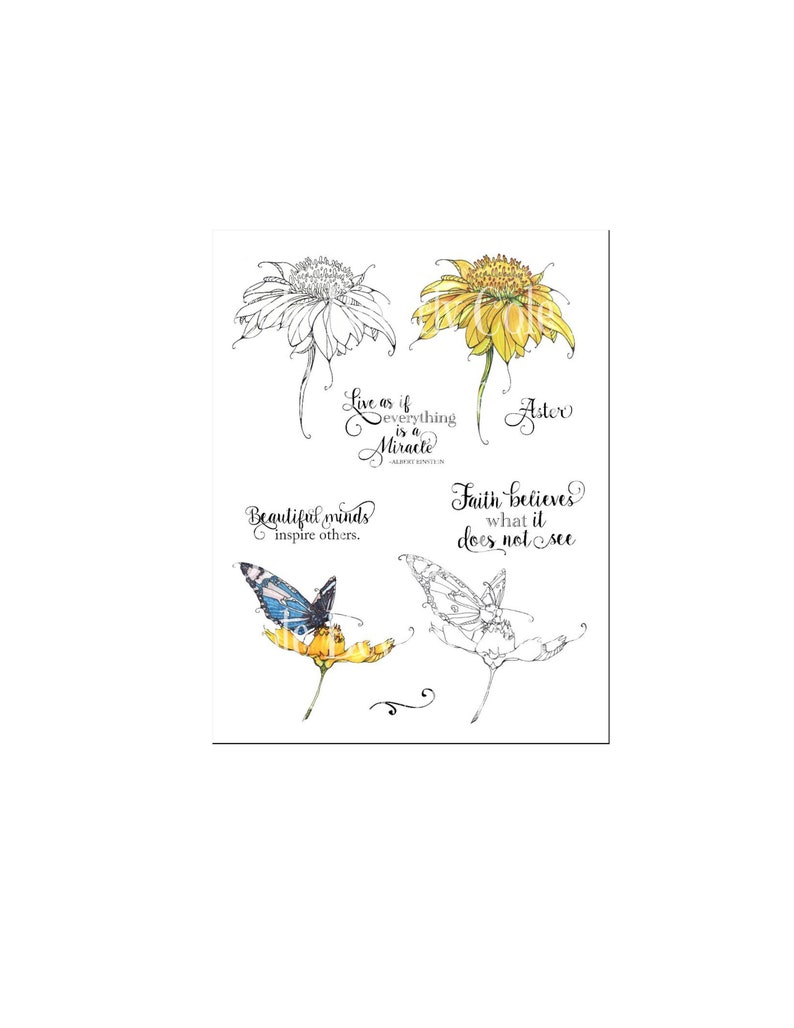
My project for this month is made using the gorgeous flower from the 

Aster Garden Digital Set Hand Colored Floral Digital Stamps image 0
My card is pretty simple but I really like how it turned out. 
I just printed the flower onto craft card stock and colored it using Polychromos pencils. i then cut the panel with a big die with patterns.
Added the sentiment, which is printed and then cut with a tag die with stitched border.
Added a few drops of Glossy accents and this is it!


               If you got inspired then it is your turn to enter our challenge

This is always an Open Challenge and always "Anything Goes”. You're welcome to add 3 entries per challenge and you may enter any crafting project with any theme.
For full details on our rules and on how to enter, please visit our rules page.


Our prizes consist of…

1st Prize: 3 sponsor images, a certificate and a badge.

2nd Prize: 1 sponsor image, a certificate and a badge.


3rd Prize:1 sponsor image, a certificate and a badge.

DT Favourites: a certificate and a badge.


Spotlight Winners: a certificate and a badge.

Until next time, take care and be creative :)